
According to a report by YouTube, creators around the world upload an average of 500 hours of video content every minute, which adds up to 30,000 hours of content per hour, or a staggering 720,000 hours of content per day. To put it into perspective, that's equivalent to 82 years of video content. With so much content available, YouTubers are constantly striving to improve the quality of their videos in order to attract more subscribers.
However, due to various reasons, YouTube and YouTubers may delete uploaded videos, which prompts many viewers to download videos for backup or offline playback. But with so many videos worth downloading, it can quickly take up a lot of storage space. To overcome this issue, many people try to download YouTube videos to an SD card. Unfortunately, YouTube doesn't offer a built-in downloading feature, which means that you'll need to use a third-party YouTube video downloader. One powerful and free option that we recommend is NoteBurner.
Now, follow the tutorial below and we will teach you to download videos from YouTube to an SD Card. Also, you can transfer the downloaded videos to any device you prefer.

NoteBurner YouTube Video Downloader is a free video downloader dedicated to helping users download videos from YouTube. The program is user-friendly and with no bundled programs. Users can download YouTube videos in HD quality (up to 8K) and keep the original subtitles and audio tracks of the video. Note that the output quality of the video is dependent on the original quality of the video, which means that if the original quality is in standard definition, the quality of the downloaded video won’t exceed the original quality. A free support service is also offered and users can ask the support team for help when they encounter any problems.

NoteBurner YouTube Video Downloader is currently available on both Windows and Mac systems. Please install the latest version on your computer before you read the following tutorial.
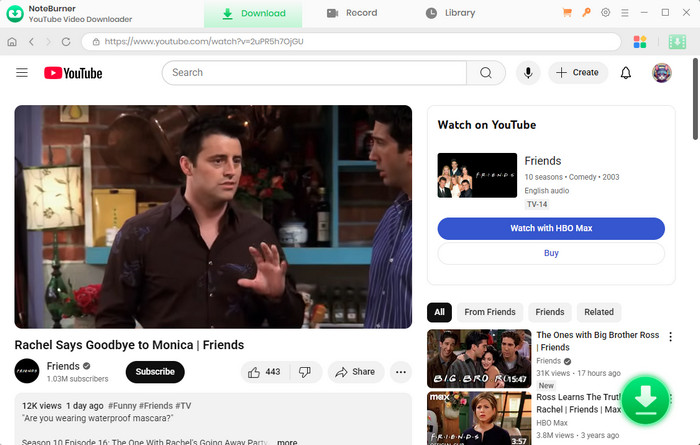
Please launch NoteBruner YouTube Video Downloader on your computer and there will be a concise interface.

Next, you can click the  button on the upper right corner to customize the output settings accordingly. You can choose the video quality (High, Medium, and Low), subtitle language, simultaneous download, output path, etc. In the simultaneous download option, you can choose how many videos you want to download at the same time.

Now, you can add the YouTube video to NoteBurner. You can add it by copying and pasting the link or entering the keywords of the video into the search box.

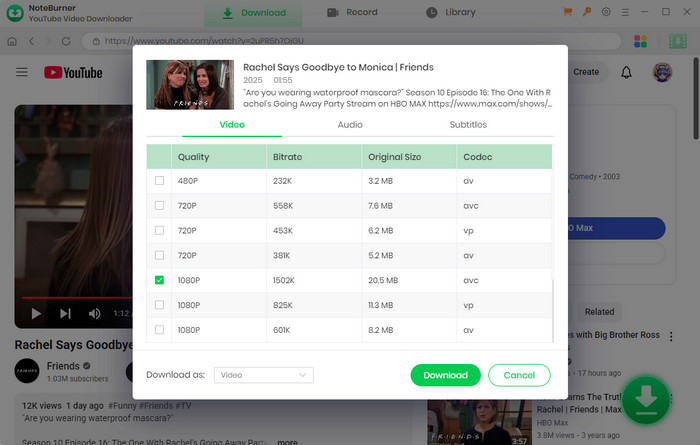
Before downloading a video, you have the option to adjust advanced settings. Simply click on the ![]() icon in the corner to open the Advanced Download window. From there, you can choose the desired video and audio format and quality.
icon in the corner to open the Advanced Download window. From there, you can choose the desired video and audio format and quality.
To download a video, select "Download as Video" from the bottom left corner. You can also choose the desired audio and subtitle options in their respective columns. If you want to download an audio file, select "Download as Audio." Note that you cannot select options in the Video and Subtitle columns. NoteBurner also enables you to download subtitles as separate files. To do so, simply choose "Download as Subtitles."

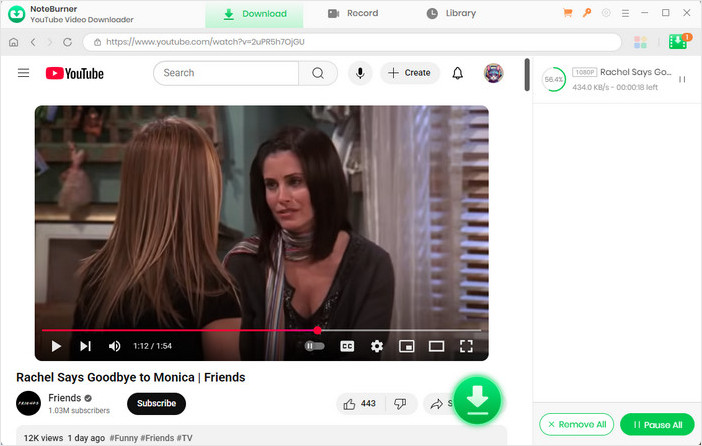
Now it is time to download the video. You can click the download icon and the video will be automatically downloaded and saved into the folder that you have selected previously in Step 2. You can check the downloaded video by clicking the Library icon and you can also locate the video by clicking the File icon.

Insert an SD card into your computer and you can then transfer the downloaded videos in the local files to the SD card. You can also transfer the videos to any other device if you want.
You won’t have to worry about storage or download restrictions anymore by downloading YouTube videos to an SD card with NoteBurner YouTube Video Downloader. Download the program and enjoy YouTube videos on any device now.